Overview
You can export your projects to WordPress.
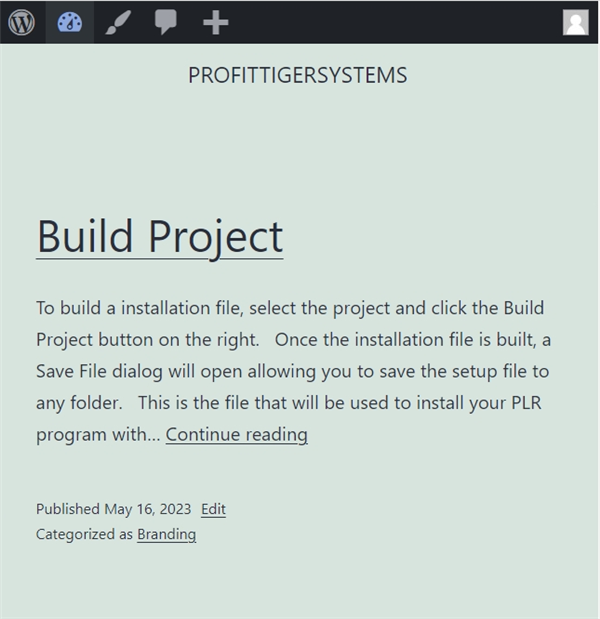
Each Section will become a category for your posts.
Each Lesson will become a post.
All steps will become content for the post. All text formatting will be included when saved to WordPress.
Your choice of Themes will dictate how the posts look.
Authentication

To allow EasyDoco to access your WordPress blog, you will need to set up authentication for the user.
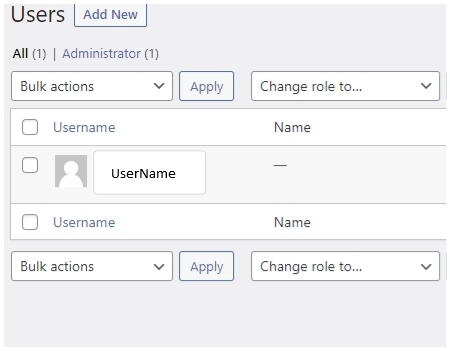
Select the user account that will be used to upload the EasyDoco project.
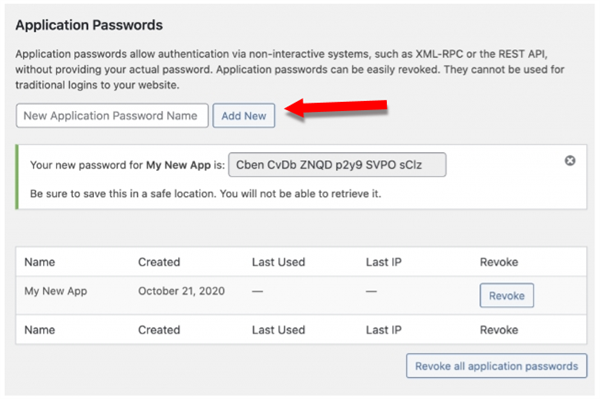
You will need to create a Application Password.
Enter in any password into the "New Application Password Name" field and click the Add New button.
It will generate a password like "Cben CvDb ZNQD p2y9 SVPO sCLz".
The account name and the newly generated password will be used by EasyDoco to connect to WordPress.
Accounts
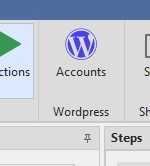
You can connect to multiple WordPress sites.
Click the Accounts, in the WordPress section, to access all accounts available.
New Acount
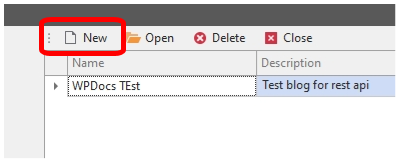
To create a new account, click the New button.
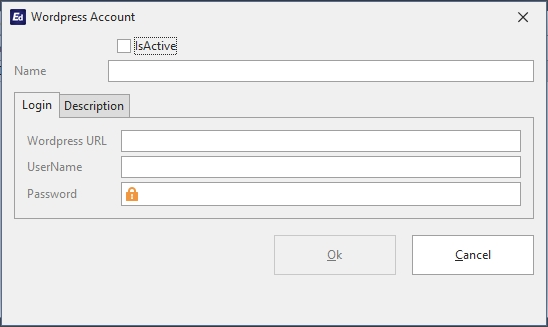
Name – the name of the account.
WordPress URL – the full URL to the wordpress blog (https://profittigersystems.com/wpdocs).
UserName – the account username that will be used to create posts. This will need permissions if it isn't part of the Admin role.
Password – the application password you generated.
Description – a decription of your account to help organize.
Open Acount
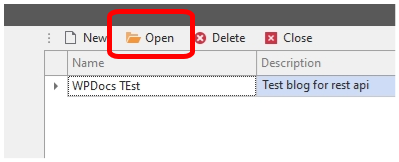
To open an existing account, select the account and click the Open button.
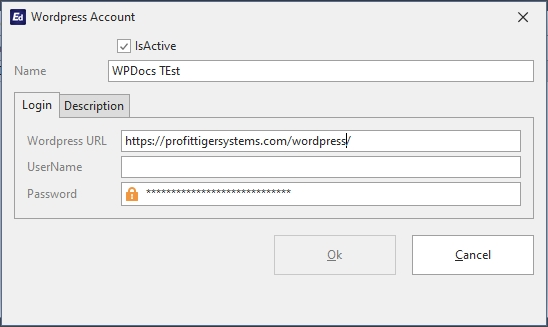
Name – the name of the account.
WordPress URL – the full URL to the wordpress blog (https://profittigersystems.com/wpdocs).
UserName – the account username that will be used to create posts. This will need permissions if it isn't part of the Admin role.
Password – the application password you generated.
Description – a decription of your account to help organize.
Delete Acount

To delete an existing account, select the account and click the Delete button.

Click the Yes button to confirm you want to delete the selected account.
Manual
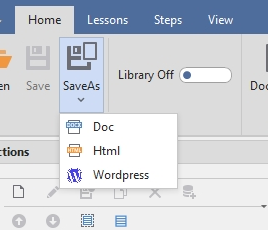
To publish your entire project to WordPress, click the SaveAs button and select the WordPress option.

Select the WordPress account that the Manual will be published too.
Click Ok to publish.
This will create categories based on the Section's names.
Then publish all of your lessons as Posts. Each lesson will have their category set to the Section name they belong too.
After the Manual is published, all posts will be updated the next time you SaveAs to WordPress.
Section
You can publish a individual Section by selecting the Section…
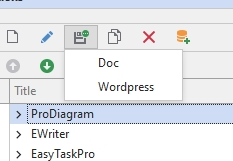
Click the SaveAs button and select the WordPress option.
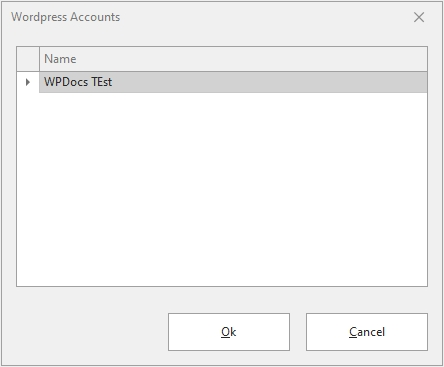
Select the WordPress account that the Section will be published too.
Click Ok to publish.
If the Section wasn't published before, it will create the category and posts for the first time.
After the Section is published, all posts will be updated the next time you SaveAs to WordPress.
Lesson
You can publish a individual Lesson by selecting the Lesson…
Click the SaveAs button and select the WordPress option in the Lessons Tab..

Select the WordPress account that the Lesson will be published too.
Click Ok to publish.
If the Lesson wasn't published before, it will create the category and posts for the first time.
After the Lesson is published, all posts will be updated the next time you SaveAs to WordPress.